Glitter Swirls by K!

Monday, July 12, 2010

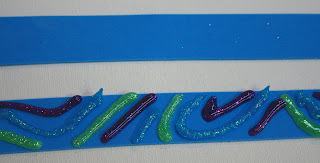
Look what I found! K Andrew is a designer who works in paper and she has done some terrific work with Swirl Glitter Glue. Go check out her two videos on fabulous sparkling, scrapbooking jelly swirls embellishments. You will want to make these right now!


Swirl glitter is so cool. There are two colors in each bottle, and when you squeeze it out, you can see both colors on your design. Amazing and so much fun!

Glitter on!
Sparkle

Butterflies

Tuesday, June 15, 2010

Glitter some pre-made butterflies for a fast and easy accent to use as home or party decor. You need:


  • pre-made butterflies ( I bought these at Michaels in the floral department, they have metal clips on the back)
  • Glitter glue, chose your colors: I used silver and black magic
  • heavy aluminum wire (I also got this in the floral department, it is easy to bend, and holds its shape well)
Try this:
1. Cut a yard of wire. Measure from one end the height you want your butterfly to be from the table. Mine was 8". So, I measured 8" from one end and wrapped the wire around my finger.
2. Continue to wind the wire into a spiral.

3. Use glitter glue to accent the butterfly. Follow the design already there, or do your own thing. Add dots or stripes for accents. Let dry. Clip to the top of the wire.

Several of these would make a pretty centerpiece for a party.

Glitter on!
Sparkle

Froggie Flip Flops Kid's Craft

Monday, June 14, 2010

Froggies on the playground, the park, the beach, the pool. These froggies are suitable for any summer day. Make some with your kids, they are easy to do. You need:

  • Glitter glue: Black Magic
  • Fun foam: green
  • 2 20mm wiggle eyes
  • 6” black chenille stem
  • 1/16” hole punch
  • printed pattern
  • scissors
  • pencil

Try this:

1. Cut out frog pattern. Trace onto green foam, cut out.

2. Glue eyes on top of frog. Outline and add a silly mouth. Let dry.

3. Punch two holes in center of frog face, where the nose would be, about 1/2” apart. Put ends of chenille stem through holes. Wrap to center of flip flop. Twist ends of chenille stem together, making sure ends are tucked under frog.

4. Repeat for other flip flop

Glitter on!

Sparkle

Glittery Backpack Tags Kid's Craft

Tuesday, June 8, 2010

Backpacks are more fun when they aren't carrying school books. For summer, they might be going to camp, to dance class, to the pool or park. Make backpack tags with fun shapes, colors, names, or fun reminders of summertime.


You need:

  • Fun Foam
  • Glitter Glue
  • Busy Kid’s Camp Tropical Silky Cord
  • Hole punch
  • Pencil
  • Scissors
Try this:
1. Cut foam pieces of your choice, glue together.
2. Punch a hole and tie cord hanger in it.
3. Decorate and write words with glitter glue. Let dry.

Make your backpack tags to match summer activities. Everyone else will be so jealous!

Glitter on!
Sparkle

1.

Glittery Pinwheels Kid's Craft

Monday, June 7, 2010

Pinwheels are so easy to make. You can use them as a toy, a party decoration, you could even use them as a cake topper. Glitter them in colors and patterns as you like.


You need (for each):

  • 7” square fun foam
  • glitter glue colors of choice
  • scissors
  • pencil with eraser
  • quilt pin
  • ruler
Try this:

1. Using glitter glue, draw design on fun foam square as desired. Let dry.

2. Measure and mark center point. Use scissors to cut from each corner into the center, stopping about an inch away from the mark

3. Fold the point of each section to the center mark. Stick the quilt pin through the four corners at the center of the pinwheel, and into the pencil eraser. You could also build it on a drinking straw or a dowel rod.

Fold your pinwheels with the painted side up or the painted side down.

Line your sidewalks with these for the summer holidays. Fun!
Glitter on!
Sparkle

Glittery Tie Dye Pendants Kid's Craft

Friday, June 4, 2010


Stock up on glitter glue and fun foam, it is going to be a sparkly summer!

Join me in this cool kid's craft jewelry project. You know you could turn this into a bookmark if you don't want jewelry. But, who wouldn't want jewelry?

You need:

  • Fun foam: white for both, black for peace sign, purple for flower
  • Glitter glue: at least 3 colors of your choice
  • Busy Kid’s Camp Tropical Silky Cord
  • Toothpick
  • Hole punch
  • Printed patterns
  • pencil
  • scissors

Try this:

1. Trace circle pattern twice onto white fun foam. Cut out circles. Punch hole in top of each for necklace cord.

2. Draw spiral pattern on each using desired glitter glue colors. Use toothpick to comb back and forth through the glitter glue, blending it. Let dry.

3.

3. Trace peace sign onto black foam. Trace flower onto purple. Cut out.

4. String both pieces together onto 24” of cord. Tie knot in ends of cord.

Groovy and Glitter on!
Sparkle

Glittery Sun Visor Kid's Craft

Wednesday, June 2, 2010

Make your own sun visor, any color, and decoration, and full of sparkly goodness!


Here is what you need to make one:

  • Sheet of fun foam
  • Glitter glue colors of choice
  • 9 inch plate
  • 6 inch plate or bowl
  • pencil
  • scissors
Try this:


1. Trace 9” plate onto foam. Place 6” plate about ¾” from edge of larger circle. Trace.

2. Decorate as desired with glitter glue. Let dry.

3. Cut out.


Draw circles, lines, words, whatever you like. Make team or club visors!

Glitter on!

Sparkle

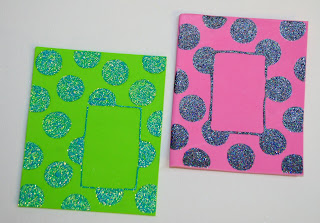
Glitter Fridge Magnet Frame Kid's Craft

Tuesday, June 1, 2010

Crafting is good, but crafting something that can actually be used is great!


To make magnet fridge frames with your kids, you need:

  • 5” x 6” piece of fun foam: pink
  • 6” x 7” piece of fun foam: black
  • 2” x 3” piece of paper
  • glitter glue: black magic
  • pencil/ruler
  • scissors
  • quarter
  • self adhesive magnet strips
(Change foam and glitter glue colors as you wish)

Try this:

1. Trace paper rectangle where desired on pink fun foam. Trace quarter as many times as desired on background.
2. Glue pink foam to center of black foam.
3. Fill in circles with black magic glitter glue. Let dry.

4. Place 3” magnet strips on back of frame at top and bottom edges. Adhere 2” x 3” photo in unpainted rectangle.

Fill the fridge with a photo gallery of glittery frames.

Glitter on!
Sparkle

Glittery Bird Tags

Sunday, May 30, 2010

Check out my guest post tonight on ThinkCrafts!


These Shrink plastic birds are so cute. Imagine a window full of them....

Glitter on!
Sparkle

Cupcake Hanger Kid's Craft

Saturday, May 29, 2010


I am sharing this simple project because it is cute. It is also inexpensive to do with a group, like at a party. You could also make these and use them like postcards...maybe birthday party invitations. We love things with dual purpose, right?

You could also glitter any simple design instead of the cupcake.

You need:

  • 3x5” watercolor paper: 140 lb.
  • Glitter Glue: hot pink, gold, red
  • red chenille stem
  • #2 pencil
  • hole punch
  • printed pattern
Try this:

1. 1. Punch holes in top corners.

2. 2. With pencil, scribble over pattern lines on back side of pattern paper.

3. 3. Turn scribble side down on hanger. Trace pattern lines to transfer to paper.

4. 4. Color in design with glitter glue. Outline hanger with a thin line of gold. Let dry.

5. String chenille stem through holes, twist ends together.

Glitter on!

Sparkle

Autograph Book Kid's Craft

Friday, May 28, 2010

Summer camp is on the horizon. Make this with your child before she heads out to campfires, games, crafts canoeing, and making new friends.


You need:

  • Blue craft foam
  • Glitter Glue: Orange, Kelly, Pineapple
  • Busy Kid’s Camp Tropical Silky Cord ( I got this in the kid's craft department at Michaels. There are 4 colors of cord that you will use for all kinds of projects, good to have in your craft stash)
  • Hole punch
  • Ruler, pencil, scissors
  • Drawing paper
  • Small stick, 5-6” long
Try this:

1. Cut two 4” x 6” pieces of craft foam. Cut drawing paper to same size, as many as you wish.

2. 2. Punch two holes side by side 1” below the top and bottom edges at the left hand side of cover. Punch holes in the same places on the back cover and the pages.

3.

3. Cut a yard of cord, any color. Hold covers and pages together. Hold the stick on the front cover between the sets of punched holes.

4. String one end of cord:

· Up through one bottom hole

· Across stick, down through closest hole

· Up through one top hole

· Across stick, down through closest hole

· Repeat

· Bring both end of cord up through holes to the front, tie in a knot

5. On the left side, draw an Orange tree trunk. Add Kelly branches. In upper right corner, draw a Pineapple sun. Add Orange words: My Summer Camp Friends.

Design the cover to reflect the kind of camp that your child is attending. Or make it a journal. Filled with her thoughts or the autographs of friends, it will be an important memento of the summer.

Glitter on!
Sparkle


Water Bottle Jacket Kid's Craft

Thursday, May 27, 2010

Why have a boring water bottle when you can have a hooty owl who is hooting Cooooooool!


Fun and easy project for kids! You need:

  • 5" x 7 ½” piece of yellow fun foam
  • glitter glue: orange, purple
  • Busy Kid’s Camp Tropical Silky Cord
  • 2 20mm wiggle eyes
  • hole punch
  • #2 pencil
  • printed pattern
  • scissors
  • white craft glue
Try this:

  1. . Punch 6 holes opposite each other on ends of fun foam piece.
  2. Scribble over pattern lines on back side of pattern paper with pencil.


  1. Turn scribble side down on foam on the left side of the rectangle. Trace pattern lines to transfer pattern to foam.
  2. Glue wiggles eyes to centers of eyes.
  3. Outline design with glitter glue. Print Coooool! on right side of rectangle. Let dry.
4. Lace the cord through the holes just like you lace up a tennis shoe. Slip it over the bottle, tighten up the lacing and tie a bow at the top.


Kid's Craft: Tie Dye Bracelets

Tuesday, May 25, 2010

This is a fun and easy project. Have all of your materials ready for a rainy day and it will entertain the kids for hours.


You need:
  • craft foam
  • glitter glue, at least three colors
  • toothpick
  • Velcro coins, self adhesive
  • scissors/ruler

Try this:
1. Cut a 1" strip.
2. Apply thick lines of your three colors.

3. Comb back and forth with the toothpick, blending the colors. Let dry.

4. Trim strip to the size needed to go around the wrist and overlap about an inch. Stick the Velcro coins onto the strip so they can hold the bracelet on the wrist.

Any color fun foam and glitter glue can be used. Design your own!

Glitter on!
Sparkle

Glittering at Girl's Night In

Friday, February 5, 2010

Tonight, Imaginina and Her Boss took me with them to a local Rescue Mission. Are you noticing a trend here? It is the second time this week that Imaginina and Her Boss invited me and my glitter to a fun night with a group of women. Fun! See Her Boss's blog for more details on the evening.


We visited with a group of girls from age 6 to 60. The glitter glue craft was a hit.

They each chose three colors of glitter glue for their peace signs, and used a high tech tool to blend the colors together. They were masters of the glitter glue tie dye look! And the high tech tool? A toothpick!

Very colorful. And sparkly!

A beautiful rainbow.

Can't wait to see what Imaginina and Her Boss invite me to next!
Glitter on!
Sparkle

Glittery Candy Cane Mice

Saturday, December 19, 2009

This is an old kid's craft. You have probably seen these cute candy cane holders. They are a fun last minute Christmas project requiring some craft foam and glitter glue. I made mine in two sizes, and added glitter glue. The smaller candy cane mouse is a pin. You or your kids will have fun making these.


You need:
  • craft foam, your color choice
  • glitter glue: pink, opal, black
  • 2 wiggle eyes
  • pencil, scissors
  • 8" of ribbon
  • pin back and white craft glue (optional)
Try this:
1. Trace and cut out a mouse and an ears pattern.
2. Fold the wide end of the mouse body over. Using scissors, cut two slits in the fold. The ears will attach in these slits.
3. Unfold the mouse body. Slide the ears into the slits, so the ears are on top of the mouse body.
4. Glitter the ears and body as desired. I made white ears with pink centers. Let dry.
5. Use opal glitter glue to glue wiggle eyes in place.
6. Add a dot of black for nose. Let dry.
7. Tie a bow around the candy cane. The candy cane fits into the strap on the back that is formed by the ear piece.
8. If you are making a small mouse, glue a pin back to the back of the mouse.


patterns, small and large mice:
Merry Christmouse and Glitter on!
Sparkle

Sparkly Ornaments for Kids to Make

Thursday, December 17, 2009

Kids of all ages! I had fun working on these, myself. Even so, they are simple enough for kids to make.


You need:
  • Big & Glitzy Glitter Glue: whatever colors you like
  • blank stencil material (or any kind of clear plastic)
  • dimensional fabric paint: silver metallic (gold would be pretty, too)
  • Sparkle gems: colors and shapes of your choice
  • scissors
  • wire or ornament hangers

  • these patterns...or draw your own...you just need simple line drawings. Print them out and make them any size on your copy machine.


Try this:
1. Lay the patterns under the stencil blank. Using dimensional paint, trace the lines of the patterns on the plastic. Let dry.

2. Fill the shape with Big & Glitzy. The thicker the glitter glue, the more sparkle when dry.

3. Set gems into Big & Glitzy while wet.

4. When Big & Glitzy is dry, cut shapes out.

5. Use a small hole punch or a small nail to make a hole at the top of each ornament. Use a piece of wire or an ornament hanger to hang the ornament on the tree.

Wouldn't it be gorgeous to hang a bunch of snowflakes in the window? Make some silver, some blue and some white. They can stay up until spring.

Glitter on Kids!
Sparkle

Related Posts with Thumbnails