Offer Expires!

Friday, January 29, 2010


A glittery shout out to all of you I met at CHA, and all of you I did not meet at CHA. Wasn't it great? What did you see that made the biggest impact on you? Remember to go here for your CHA surprise. This offer has an expiration date, don't dawdle.

I would love to know if you made it by the booth and saw Sparkle 21.

Glitter on!
Sparkle

Doggie Treat Jar

Thursday, January 28, 2010


Treats for Princess! Or Fluffy. Or Lassie. Or Fido. Make this jar in a few minutes.

You need:

  • Square glass jar
  • Sparkle 21: Mermaid Sparkle, Blue Heaven Sparkle
  • Sparkle gems: 8mm round holographic
  • Printed pattern
  • Tape
Try this:

1. Adjust size of pattern to fit the side of the jar. Tape it inside.

2. Draw over the pattern lines of the tiara with Blue Heaven. Set gems at the tips and inside each spiral.

3. Use Mermaid to print the letters under the tiara.

4. Fill with Rover's favorite treats.

If you don't have a dog, then you can be the Princess. Put your favorite treats in the jar. :)

Glitter on!
Sparkle

Bluebird of Glittery Happiness

Tuesday, January 26, 2010

Here is one of my favorite outfits from the booth.


T-Shirt with matching jeans.

You need:
t-shirt
jeans
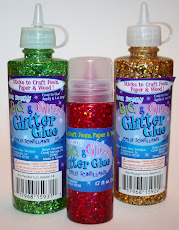
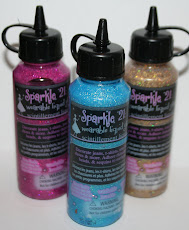
Sparkle 21: Vintage Sparkle, Copper Sparkle, Blue Suede Sparkle
printed patterns
chalk pencil
2 shirt painting boards
straight pins

Try this:
1. Put the shirt on one board. Pin the leg of the jeans to the other board.
2. Size the pattern as fits your shirt and jeans.


3. Trace the pattern lines with chalk pencil. Turn chalk side down on garment. Rub the back of the paper to transfer lines to fabric.
4. Use Sparkle 21 to cover the pattern lines: Copper vines, Blue Suede bird with Vintage feathers, Vintage flowers on branches.
5. To make the flowers, squeeze out dots of glitter. Place a straight pin in the center of the dot, and draw toward the stem, making a teardrop shape.
6. Let dry at least 24 hours.

Use the photo for your pattern placement, or design your own.

Glitter on!
Sparkle

A Sparkling Booth

Monday, January 25, 2010

How nice is this? In the booth, they made me a wall that invites everyone to join us on this blog. I have handed out so many business cards to fellow glitter lovers.


Some of the projects that are posted on the blog, I am sure you have seen them. Here they are displayed in the booth. These are some of the Mod Girl projects from last week.

Remember that you can click on the photos to make them larger, then you can see everything in detail.


There is a really terrific demonstrator working in the booth, showing guests how to use Sparkle 21. I get to spend my time walking around the show floor. There is a lot of glitter and bling in the show this year. Really pretty, but not as gorgeous as Sparkle 21!

Glitter on!
Sparkle

Give Peace a Glittery Chance

Sunday, January 24, 2010

Today was kid's craft day. I have to report that every kid we had at the table was so cute, very well behaved, super smart, and loved to craft. Attention Mothers! Crafting must do something great for kids! It is all true. Every child we played with today was all of the above.


We threw glitter glue, beads and gems onto the center of the table and the creating began.

Cute and smart!

Patient...adorable

Princess!!

Could she be cuter? I got a hug.

Pushing up the sleeves, getting down to business.

Peace!

Even the tiny ones did amazingly well.

So, you can see that we had a great time at the Make it Take it table today. The big kids and the really big kids were pretty great too.

Thanks to all of you who joined us today to give peace a glittery chance.

Glitter on! (California has it covered)
Sparkle

Michaels Make it Take it

Friday, January 22, 2010

We had fun today. Doesn't it look like it? I am sure we spread glitter everywhere. The poor demonstrators that came to the table after us found a table just covered in glitter. Pretty.


Michaels sponsored and hosted us. I met so many great crafters and the best part? Everyone enjoyed it!

Especially the young crafters!

Glitter on! (the table, the chairs, the floor and ourselves!)
Sparkle

The Lone Bird Tote

I really like simple little birds as a design element right now, and since yesterday's tweeters turned out cute, I kept the theme going today. This is a very pretty tote bag, even without the decorating. Adding Sparkle 21 birds and branches gives it a one-up on everyone else's tote bag.


I did the pattern with just one color of Sparkle 21, Night Sparkle. But, if you wish for more color, use red, copper, green, whatever you like.

You need:

  • Patterned totebag
  • Sparkle 21: Night Sparkle
  • Printed pattern
  • Dark chalk pencil
  • Fabric glue
  • 5/8” wide black ribbon with white dots (enough to fit the height of your bag twice)
Try this:

1. Trace pattern lines with chalk pencil. Turn chalk side down on bag. Rub back of paper to transfer lines.


2. Cover pattern lines on bag with thick lines of Night Sparkle. Let dry.

3. Glue ribbon on either side of design on totebag.

Pretty,
Glitter on!
Sparkle

Glitter Storefront

Here I am in Anaheim, ready for the Craft Supershow and the CHA Show. I had a little free time today and ended up at Downtown Disney. This storefront caught my eye. It was sparking even though it was raining. Plus, I really liked the swirly design. I am thinking about using it as inspiration for a pattern.


When I got up close, I noticed that the design was made of square mirrors, and it looked like giant size glitter. And the jewelry inside was pretty interesting too.

Glitter on (even in giant size)!
Sparkle

Three Little Glitter Birds

Wednesday, January 20, 2010

These little birds are so easy to make that you don't even need a pattern. I put them on a long sleeve onesie for a baby, but they would be cute so many other places. How about on an adult sleeve? Down a pantleg? The front of a hoodie? On a notebook? You can make them any size. Make them smaller and put them on a hat, or on shoes. Any Nature Girl will love these little birdies.


You need:

  • Black onesie (or any surface)
  • Sparkle 21: Blue Suede Sparkle, Leaf Sparkle, Night Sparkle
  • Straight pin
  • Chalk pencil
  • something round to trace (I used a glue bottle) This is optional. Feel free to freehand a half circle.
Try this:

1. Use chalk pencil to draw three half circles on shirt.

2. Outline with Blue Suede.

3. Add Night Sparkle legs. For an eye, add a Leaf Sparkle dot with a smaller Night Sparkle dot on top of it.

4. Make feathers by making a dot of Blue Suede, place a straight pin in the center, drag out to make a teardrop shape.

5. Print tweet, chirp, peep under the birds.

Very tweet.
Glitter on!
Sparkle

LOVE Tote

Tuesday, January 19, 2010

Fast and easy, is this tote bag, and easy enough for kids to make. I used bright neon colors, in remembrance of 70s day-glo...but change colors as you wish. To make it,


you need:

  • Blue totebag
  • Sparkle 21: Pina Coloda Sparkle, Blue Suede Sparkle, Limeade Sparkle, Raspberry Sorbet Sparkle
  • Printed pattern
  • Chalk pencil
Try this:

1. Trace pattern lines with chalk pencil. Turn chalk side down on tote. Rub back of paper to transfer lines to fabric.


2. Draw over lines of letters as shown. Add dots or lines for background in each letter. Let dry.
This would be cute on the back of a hoodie.
Glitter on!
Sparkle

Cupcake Apron

Friday, January 15, 2010

If you can't eat a cupcake everytime you bake, you can wear one! I painted this strawberry cupcake on an apron and matching hot pads. Since it is a simple line art pattern, it takes on a few minutes to complete.


Cupcakes in lemon (yellow) and vanilla (white) are cute, even without sprinkles.

You need:

  • Apron
  • Hot pads
  • Sparkle 21: Blue Heaven Sparkle, Limeade Sparkle (or colors that match your apron), Pink Sparkle, Strawberry Sparkle, Pina Colada Sparkle. Crystal Sparkle, and some extra colors if you want to add sparkles
  • Printed pattern
  • Chalk pencil
Try this:

1. Print pattern in sizes needed to fit your apron and hot pads. Draw over lines of pattern with chalk pencil. Turn chalk side down on fabric. Rub back of paper to transfer lines.


2. Color in cupcake as desired. Let dry.

3. Add words as desired.

4. Add sprinkles of any colors. Let dry.


Change colors to make your cupcakes in any flavor you like.

Glitter on!
Sparkle

Storage Tub

The most fun part of this project is that it was unplanned, informal, casual, no pattern needed, doodling fun. Try it. Grab some colors of Sparkle 21 and just go for it.


Glitter on!
Sparkle

Peace, Love, Togetherness, and Glitter

Thursday, January 14, 2010

These tiny canvases have been on my work table calling me to do something with them. I could not decide until a friend sent me the tiny easels. And then I knew. Peace, Love, and Togetherness. When I combined those themes with rick rack, I had 1972 flashbacks! They are easy to make.


You need:

  • Sparkle 21: Very Berry Sparkle, Blue Suede Sparkle, Pina Colade Sparkle, Limeade Sparkle
  • Three 3” square canvases
  • Three small wooden easels
  • Black acrylic paint
  • Small flat paintbrush
  • Printed designs
  • tracing paper
  • Chalk pencil
  • 1 yard lime green small rick rack
  • white craft glue
Try this:

1. Paint canvases and easels black. Let dry.

2. Print designs. Lay tracing paper over them and trace with pencil. Trace pattern lines with chalk pencil. Turn chalk side down on canvas. Rub back of paper to transfer lines. Remember to trace the backside of the earth pattern to make the continents face the right direction.

If you are using a different size canvas, use a copy machine to make the patterns the right size.

3. Fill in designs on canvases with Sparkle 21, as desired. Let dry.

4. Glue rick rack around outside edge of each canvas.

5. Outline front surfaces of easel with desired color of Sparkle 21.


Peace

Love

Togetherness

Have fun and glitter on!
Sparkle

Related Posts with Thumbnails