Glitter Pumpkin Patch

Thursday, September 23, 2010


You know how I love projects that are easy to make, inexpensive, and glittery! This autumn pumpkin patch project fits neatly into all three categories. I made my pumpkins out of scraps of wood that I had lying around from another project gone bust.


Here is what you need:
  • several chunks of wood that can stand up on their own
  • Holographic Glitter Sample Pack
  • White glue or Mod Podge
  • a 1 1/4" long piece of 1/4" wide dowel rod for each pumpkin (I cut my dowel rod into pieces with a kitchen knife)
  • green silk leaves (OK, these are not pumpkin leaves, but they were what I had, call it creative license)
  • a drill with a 1/4" bit
  • acrylic paint: orange and brown or green for stems
  • flat paintbrush
  • hot glue gun and glue
Try this:
1. Paint the wood pieces orange. You probably need a second coat. Let the first coat dry before painting the second. Also paint the stems. Let everything dry.

2. At the center top of each piece, drill a hole down into the wood. It does not have to be deep, 1/4" will do. Glue the stem into the hole. Repeat for each pumpkin.

3. Cover the front of the pumpkin with glue or Mod Podge. Sprinkle the glitter on while it is wet. I did not think I would have enough orange glitter to do 5 pumpkins, so I mixed the packet of orange with the packet of gold. It lightened the color a bit and made it seem even more sparkly. Glitter all of the pumpkins.

4. Use the glue gun to glue one or two leaves to each stem.

If you do not have scraps of wood sitting around, I think you could adapt this to many other objects. How about candles, jars, tin cans, spools, books? Look around the house and see what you have.

Glitter on!
Sparkle

Glitter Leaves Shirt

Wednesday, September 22, 2010


Fall is my favorite time of year. I am fascinated by the color process on the trees in my neighborhood. I picked a two green leaves off my own maple tree today for this project. It is very easy, allows for your own creativity. It is the perfect project to do with children.

You need:
  • a black shirt
  • some leaves
  • Sparkle 21 in a couple fall colors, I used Jungle Sparkle, Strawberry Sparkle, and Copper Sparkle
  • a flat paintbrush
Try this:
1. Squeeze some Sparkle 21 onto the front of a leaf. Use the brush to spread the liquid glitter to cover the leaf. It should be spread thickly. You can use more than one color on a leaf if you wish.

2. Press the leaf onto the shirt, glitter side down. Push all over the leaf with your fingers, transferring the glitter. Carefully lift the leaf.
3. Print as many leaves as you wish on the shirt. Let the shirt dry.

4. Loosely outline the leaves with Sparkle 21 straight out of the bottle tip. Let it dry at least 2 days before wearing.

Use different size and types of leaves and add in some gold glitter if you love it. Very autumnal!

Glitter on!
Sparkle

Do Your Pencils Sparkle?

Tuesday, August 31, 2010


Glitter pencils to go with your glitter notebook? They are so easy, it is crazy not to make some.

Start with pencils, any color.

Apply Sparkle 21 in whatever colors you love. Use more than one color if you wish. Let them dry. Be the envy of everyone else.

Glitter on!
Sparkle

July!

Friday, July 9, 2010

Here is the July version of our monthly framed kid's craft. See the original post for how to get started if you have not yet.


Love this beach umbrella. Wish it was life size and I was under it sitting on the beach! Just trace the pattern onto a piece of craft foam, cut out and glitter. Use any colors you want.
Print out this pattern and size it on your copier to fit the frame you have. Cut a long thin strip for the umbrella pole.

Glitter on!
Sparkle

Helen's Glitter and Button Flower Pots

Wednesday, June 23, 2010

Look at these really cute post it note holders that my friend Helen made for us today. Helen works for Blumenthal Lansing and I am visiting her this week in New Jersey. Here is Helen to tell you how to make them:


You need:
  • Creatology flower die cuts (get these at Michaels and they come in other flower shapes too)
  • scrapbook paper
  • ribbon
  • fine glitter, color of your choice
  • Mod Podge
  • flat paintbrush
  • glue of your choice
  • acrylic paint: color of your choice
  • small post it note
  • pencil
  • scissors
To make it:
1. Lay the die cut on the paper and trace the pot. Cut it out.
2. Paint flower and stem. Let dry.
3. Use glue or Mod Podge to adhere the paper to the pot.
4. Glue a piece of ribbon to trim the pot.
5. Brush a coat of Mod Podge on the flower head. While it is wet, sprinkle glitter over it. Shake off excess and recycle it.
6. Glue buttons across ribbon trim and wherever you like on the flower. You can layer some buttons or glue them individually.

7. Place the post it note pad where you like it.

You could add a magnet to the back and put it on the fridge, or sit it on your desk, or attach two together to make a card, or glue it to the front of your notebook to keep yourself organized. Be creative, I bet you can think up many good ideas for this cute project!

My thanks to Helen. Don't you just love cute button projects??
Glitter on!
Sparkle

Froggie Flip Flops Kid's Craft

Monday, June 14, 2010

Froggies on the playground, the park, the beach, the pool. These froggies are suitable for any summer day. Make some with your kids, they are easy to do. You need:

  • Glitter glue: Black Magic
  • Fun foam: green
  • 2 20mm wiggle eyes
  • 6” black chenille stem
  • 1/16” hole punch
  • printed pattern
  • scissors
  • pencil

Try this:

1. Cut out frog pattern. Trace onto green foam, cut out.

2. Glue eyes on top of frog. Outline and add a silly mouth. Let dry.

3. Punch two holes in center of frog face, where the nose would be, about 1/2” apart. Put ends of chenille stem through holes. Wrap to center of flip flop. Twist ends of chenille stem together, making sure ends are tucked under frog.

4. Repeat for other flip flop

Glitter on!

Sparkle

Glittery Backpack Tags Kid's Craft

Tuesday, June 8, 2010

Backpacks are more fun when they aren't carrying school books. For summer, they might be going to camp, to dance class, to the pool or park. Make backpack tags with fun shapes, colors, names, or fun reminders of summertime.


You need:

  • Fun Foam
  • Glitter Glue
  • Busy Kid’s Camp Tropical Silky Cord
  • Hole punch
  • Pencil
  • Scissors
Try this:
1. Cut foam pieces of your choice, glue together.
2. Punch a hole and tie cord hanger in it.
3. Decorate and write words with glitter glue. Let dry.

Make your backpack tags to match summer activities. Everyone else will be so jealous!

Glitter on!
Sparkle

1.

Glittery Pinwheels Kid's Craft

Monday, June 7, 2010

Pinwheels are so easy to make. You can use them as a toy, a party decoration, you could even use them as a cake topper. Glitter them in colors and patterns as you like.


You need (for each):

  • 7” square fun foam
  • glitter glue colors of choice
  • scissors
  • pencil with eraser
  • quilt pin
  • ruler
Try this:

1. Using glitter glue, draw design on fun foam square as desired. Let dry.

2. Measure and mark center point. Use scissors to cut from each corner into the center, stopping about an inch away from the mark

3. Fold the point of each section to the center mark. Stick the quilt pin through the four corners at the center of the pinwheel, and into the pencil eraser. You could also build it on a drinking straw or a dowel rod.

Fold your pinwheels with the painted side up or the painted side down.

Line your sidewalks with these for the summer holidays. Fun!
Glitter on!
Sparkle

Glittery Tie Dye Pendants Kid's Craft

Friday, June 4, 2010


Stock up on glitter glue and fun foam, it is going to be a sparkly summer!

Join me in this cool kid's craft jewelry project. You know you could turn this into a bookmark if you don't want jewelry. But, who wouldn't want jewelry?

You need:

  • Fun foam: white for both, black for peace sign, purple for flower
  • Glitter glue: at least 3 colors of your choice
  • Busy Kid’s Camp Tropical Silky Cord
  • Toothpick
  • Hole punch
  • Printed patterns
  • pencil
  • scissors

Try this:

1. Trace circle pattern twice onto white fun foam. Cut out circles. Punch hole in top of each for necklace cord.

2. Draw spiral pattern on each using desired glitter glue colors. Use toothpick to comb back and forth through the glitter glue, blending it. Let dry.

3.

3. Trace peace sign onto black foam. Trace flower onto purple. Cut out.

4. String both pieces together onto 24” of cord. Tie knot in ends of cord.

Groovy and Glitter on!
Sparkle

Glittery Sun Visor Kid's Craft

Wednesday, June 2, 2010

Make your own sun visor, any color, and decoration, and full of sparkly goodness!


Here is what you need to make one:

  • Sheet of fun foam
  • Glitter glue colors of choice
  • 9 inch plate
  • 6 inch plate or bowl
  • pencil
  • scissors
Try this:


1. Trace 9” plate onto foam. Place 6” plate about ¾” from edge of larger circle. Trace.

2. Decorate as desired with glitter glue. Let dry.

3. Cut out.


Draw circles, lines, words, whatever you like. Make team or club visors!

Glitter on!

Sparkle

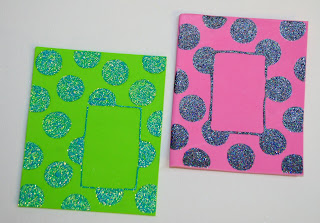
Glitter Fridge Magnet Frame Kid's Craft

Tuesday, June 1, 2010

Crafting is good, but crafting something that can actually be used is great!


To make magnet fridge frames with your kids, you need:

  • 5” x 6” piece of fun foam: pink
  • 6” x 7” piece of fun foam: black
  • 2” x 3” piece of paper
  • glitter glue: black magic
  • pencil/ruler
  • scissors
  • quarter
  • self adhesive magnet strips
(Change foam and glitter glue colors as you wish)

Try this:

1. Trace paper rectangle where desired on pink fun foam. Trace quarter as many times as desired on background.
2. Glue pink foam to center of black foam.
3. Fill in circles with black magic glitter glue. Let dry.

4. Place 3” magnet strips on back of frame at top and bottom edges. Adhere 2” x 3” photo in unpainted rectangle.

Fill the fridge with a photo gallery of glittery frames.

Glitter on!
Sparkle

Cupcake Hanger Kid's Craft

Saturday, May 29, 2010


I am sharing this simple project because it is cute. It is also inexpensive to do with a group, like at a party. You could also make these and use them like postcards...maybe birthday party invitations. We love things with dual purpose, right?

You could also glitter any simple design instead of the cupcake.

You need:

  • 3x5” watercolor paper: 140 lb.
  • Glitter Glue: hot pink, gold, red
  • red chenille stem
  • #2 pencil
  • hole punch
  • printed pattern
Try this:

1. 1. Punch holes in top corners.

2. 2. With pencil, scribble over pattern lines on back side of pattern paper.

3. 3. Turn scribble side down on hanger. Trace pattern lines to transfer to paper.

4. 4. Color in design with glitter glue. Outline hanger with a thin line of gold. Let dry.

5. String chenille stem through holes, twist ends together.

Glitter on!

Sparkle

Autograph Book Kid's Craft

Friday, May 28, 2010

Summer camp is on the horizon. Make this with your child before she heads out to campfires, games, crafts canoeing, and making new friends.


You need:

  • Blue craft foam
  • Glitter Glue: Orange, Kelly, Pineapple
  • Busy Kid’s Camp Tropical Silky Cord ( I got this in the kid's craft department at Michaels. There are 4 colors of cord that you will use for all kinds of projects, good to have in your craft stash)
  • Hole punch
  • Ruler, pencil, scissors
  • Drawing paper
  • Small stick, 5-6” long
Try this:

1. Cut two 4” x 6” pieces of craft foam. Cut drawing paper to same size, as many as you wish.

2. 2. Punch two holes side by side 1” below the top and bottom edges at the left hand side of cover. Punch holes in the same places on the back cover and the pages.

3.

3. Cut a yard of cord, any color. Hold covers and pages together. Hold the stick on the front cover between the sets of punched holes.

4. String one end of cord:

· Up through one bottom hole

· Across stick, down through closest hole

· Up through one top hole

· Across stick, down through closest hole

· Repeat

· Bring both end of cord up through holes to the front, tie in a knot

5. On the left side, draw an Orange tree trunk. Add Kelly branches. In upper right corner, draw a Pineapple sun. Add Orange words: My Summer Camp Friends.

Design the cover to reflect the kind of camp that your child is attending. Or make it a journal. Filled with her thoughts or the autographs of friends, it will be an important memento of the summer.

Glitter on!
Sparkle


Water Bottle Jacket Kid's Craft

Thursday, May 27, 2010

Why have a boring water bottle when you can have a hooty owl who is hooting Cooooooool!


Fun and easy project for kids! You need:

  • 5" x 7 ½” piece of yellow fun foam
  • glitter glue: orange, purple
  • Busy Kid’s Camp Tropical Silky Cord
  • 2 20mm wiggle eyes
  • hole punch
  • #2 pencil
  • printed pattern
  • scissors
  • white craft glue
Try this:

  1. . Punch 6 holes opposite each other on ends of fun foam piece.
  2. Scribble over pattern lines on back side of pattern paper with pencil.


  1. Turn scribble side down on foam on the left side of the rectangle. Trace pattern lines to transfer pattern to foam.
  2. Glue wiggles eyes to centers of eyes.
  3. Outline design with glitter glue. Print Coooool! on right side of rectangle. Let dry.
4. Lace the cord through the holes just like you lace up a tennis shoe. Slip it over the bottle, tighten up the lacing and tie a bow at the top.


Kid's Craft: Tie Dye Bracelets

Tuesday, May 25, 2010

This is a fun and easy project. Have all of your materials ready for a rainy day and it will entertain the kids for hours.


You need:
  • craft foam
  • glitter glue, at least three colors
  • toothpick
  • Velcro coins, self adhesive
  • scissors/ruler

Try this:
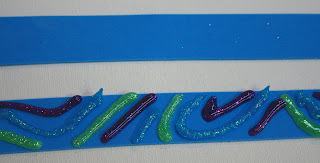
1. Cut a 1" strip.
2. Apply thick lines of your three colors.

3. Comb back and forth with the toothpick, blending the colors. Let dry.

4. Trim strip to the size needed to go around the wrist and overlap about an inch. Stick the Velcro coins onto the strip so they can hold the bracelet on the wrist.

Any color fun foam and glitter glue can be used. Design your own!

Glitter on!
Sparkle

June Flip Flops Kid's Craft

Monday, May 17, 2010

And now! We add a June project to this kid's project. For instructions, go here. Just use the flip flop pattern instead of the flower. Then on June 1, take the flower out of the frame and put in your new flip flop. Fun!

Glitter on!

Sparkle

Related Posts with Thumbnails