You are the Best!

Tuesday, August 25, 2009

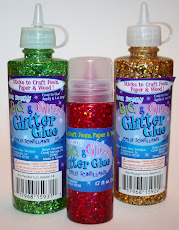
Dig out all of your craft scraps, and let's make award badges for everyone we know. Who doesn't love a little encouragement or recognition? So, what if it is for a funny or small achievement, it can be awarded. I made this one for myself. It is not for an achievement so much, as it just makes me feel groovy! I cut the back out of hot pink stiffened felt, the center circle out of a cereal box ( I said scraps!) and added some silver glitter glue (peace, man) and a ribbon bow. I glued a pin back behind the bow.


Click on the pics to see them larger......
Cereal box circle covered with some pink fun foam. Glue some bits of hot pink boa on the back. Add a ribbon to go around the neck. Draw on it with marker and glitter glue. Are you getting the idea?

This is a basic plan for an award badge:


1. Background: Cut a circle from cardboard, posterboard, or a cereal box like I did. You can trace a glass or a roll of tape, whatever you have at hand. Cover the circle with fun foam, scrapbooking paper, piece of fabric, construction paper, etc.

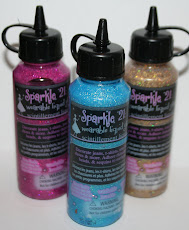
2. Designate the award: Draw or print with glitter glue, marker, glue with glitter, make it eye catching. I know you can think up an award for everyone you know. Or maybe you are having a field day or contest and need awards. Here you go!

3. More decoration: as much or as little as you like.

4. Make it wearable: Add a ribbon to go around the neck like an olympic medal, or a pin back to be pinned onto the shirt.

Cereal box circle covered with scrapbooking paper. Little alphabet beads set into glitter glue. You can spell anything that way.

Construction paper over the cereal box circle. Glitter glue MVP. Short pieces of ribbon stapled to the back.

Who do you know that loves rhinestones?

Cereal box circle covered in scrapbooking paper. Double sided adhesive letters. Glitter sticks to the front, the back sticks to the circle. Add a piece of ribbon for decoration, and a pin back to make it wearable.

Cover the cereal box circle with a piece of paper and then a coating of glitter glue. Set the alphabet beads into the glitter while wet. Add ribbon and a pin back.

A larger circle of felt behind the cereal box circle. Cover the smaller circle with fun foam. Add a glitter glue cross and letters, ribbon and pin back.

The sky is the limit. And this is a good way to use up your scraps of paper and ribbon and such. Make yourself an award that says Most Creative!

Glitter on,
Sparkle

Hearts and Stars Mobile

Glitter glue is one of the seven wonders of the world, isn't it? And it comes in so many colors!


This is a fun and girly mobile. It was inexpensive to make and of course, sparkly! You could add more levels of dangles and make it bigger, or you could make it smaller with only one level. Let the girls make it themselves, they can decorate with words and names and whatever is meaningful to them.

I used sticks from the yard for the cross bars, they were free! Make sure to glitter both sides of each heart or star so when they twirl around, there is something to see.

Add gems or sequins or extra glitter. Little white alphabet beads would be fun too. It can be hung in a bedroom, a classroom, anyplace. Mine is hanging on my patio. Give it a try, making it is as fun as hanging it!

You need:

Paper mache shapes: 3 hearts, 3 stars (get them with cord hangers on them)

Acrylic paint: turquoise, pink, yellow, lavender, lime (or whatever colors you love)

Glitter Glue: opal, silver, purple, blue moon ( or your favorite colors)

4 yards lime green 3/8” grosgrain ribbon (the cutest ribbon is available at craft stores)

Bling Bling! Large asst shape gems

10” stick and two 8” sticks

flat paintbrush

palette

ruler

Try this:

1. Paint paper mache shapes and sticks as desired. Let dry.

2. Decorate both sides of each paper mache shape with glitter glue doodles of lines, dots, stripes, words etc. Add adhesive backed gems where desired. Let dry.

Note: you can also use gems without adhesive backing. Squeeze out some glitter glue. Set the gem into the wet glitter glue and tap it gently down into the glitter to set it.

3. Cut four 9” pieces of ribbon. Tie two finished paper mache pieces to each end of an 8” stick. Tie through gold cord on paper mache pieces. Trim ribbon ends if desired.

4. Cut 1 ½ yard length ribbon. Tie one end to a finished paper mache piece, tieing through gold cord.

5. About 5 ½” above knot, tie to center of short stick holding two paper mache pieces.

6. About 4 above that knot, knot to one end of longest stick.

7. Repeat steps 3-6 for the other side of the mobile.

8. Tie remaining ribbon ends together in bow about 8” above center of top stick.

9. Hang it!


Have fun and glitter on!

Sparkle


Glitter Shirts

Tuesday, August 11, 2009


Annabelle and Allie came over today to show me how to use Sparkle 21 to glitter a pretty shirt. They are so creative. Their technique is very easy and allows for a lot of your own creativity. As they say, "Make it you!"

This is the shirt I made following Annabelle and Allie's instructions. Try it yourself, it is quite easy.

You need:
  • a shirt on a shirt board
  • Sparkle 21 in 2 or 3 colors of your choice
  • masking tape
  • waxed paper
  • heart gems (optional)
Try this:
1. Place pieces of tape on the shirt where you will put the design. Press the tape firmly to the shirt.
2. Randomly squeeze Sparkle 21 on the front of the shirt.
3. Place the waxed paper over the glitter. Press and smoosh with fingers, to make the Sparkle 21 blend. Lift waxed paper to ad more Sparkle 21 if desired.
4. Remover waxed paper. Remove masking tape.
5. If desired, add heart shaped gems. Squeeze two small dots of Sparkle 21 onto shirt, place heart gem into glitter whole wet. Tap down into glitter. Let dry before removing from board.

This would be a fun party project for a group of any age. It took only minutes to make a great looking and sparkly shirt!

Thank you Annabelle and Allie!
Glitter on!
Sparkle

Butterflies

I made these butterflies for a kid's project. They are made out of fun foam. I hung them in the tree on the patio and they looked so cute, I thought that we could take them away from the kids and make them ourselves. They are inexpensive to make so you could make a flock of them for a party.


You need:
  • self adhesive fun foam (your choice of colors)
  • glitter: black
  • white craft glue
  • scissors
  • #2 pencil
  • wooden pinch clothespins (1 for each butterfly)
  • black chenille stems (optional)
Try this:
1. Print out the butterfly patterns. On the copy machine, make them whatever size you wish.
2. Trace butterflies and wing accents onto fun foam. Remember to turn the wing accent pattern upside down to make a mirror image design for the other wing. Trace one body for each butterfly. Cut out.
3. Remove paper backing on wing accents and body pieces and stick on butterflies.
4. Cover wing accents and body with glue. Sprinkle glitter on glue while it is wet. Gently, shake off excess glitter. Let dry.
5. Glue a clothespin to the back of each butterfly. Let dry before using.


Additional design ideas:
  • change the black glitter to different colors for more colorful butterflies
  • add chenille stem antennae if desired
  • hang with a wire or cord instead of a clothespin
Make these for your end of summer blow out party!
Glitter on!
Sparkle

Velvet Glitter

Tuesday, August 4, 2009


How great is it that there are so many kinds of glitter? There is a glitter for any project. They are all fabulous and sparkly, but they each have different finishes, sizes, or properties.

If you have not tried Velvet Glitter, what are you waiting for? Velvet Glitter has both a sparkly and a pearly finish. It is fine, smooth, refined, classy......like velvet! And you can get it at any Michaels store.

Glitter on!
Sparkle


Velvet Glitter Heart Frame

This is one of the projects that people loved at the consumer craft show in Orlando last week. Want to try it?


You need:
  • any size white wood frame
  • Velvet Glitter Sample Pack (You can buy Velvet Glitter at Michaels!)
  • Awesome Glue (You can also buy Awesome Glue at Michaels!)
  • piece of pretty ribbon
  • 3-4 plastic heart buttons
  • 11-12 plastic round buttons
  • Tools for Glittering (optional)
  • pencil
Try this:
1. Glue ribbon across two frame corners. Wrap ribbon around sides to the back of frame.
2. Draw several hearts on the frame. You can trace different size heart buttons if you want to use patterns.
3. Work on one heart at a time. Fill in heart with glue. Sprinkle glitter into wet glue. Shake off excess glitter.
4. Glue buttons any place you like on frame.

Be creative. Try your own design! Pick your favorite colors!

You will really like the Tools for Glittering. Two funnels will help you reuse and save excess glitter for next time. Use the little scoop to apply glitter right where you want it. The glue spreader helps you get a smooth layer of glue. And the brush will clean up your project nicely.

Glitter on!
Sparkle

Big & Glitzy Flower Frame

This is the frame that consumers from all over the world made last week at the consumer craft show in Orlando. It is so cute, I knew you would want to know how to do it yourself.


You need:
  • any size white wood frame
  • Big & Glitzy Glitter Glue: Emerald and some other colors you like
  • 12-15 plastic flower shaped buttons
  • 11-12 round plastic buttons in different sizes
  • Awesome Glue
  • length of cute green ribbon that is long enough to go across the width of the frame
Try this:
1. Use Awesome Glue to attach the ribbon across the top of the frame, as shown. Wrap it around the sides and to the back.
2. Glue large flower buttons around the frame as you desire. Glue some smaller flower buttons on top of those. Glue some round buttons on top for centers.
3. You can also glue large round buttons directly to the frame and fill them in with Big & Glitzy in whatever color you love.
4. Glitz it up!
  • Add some Big & Glitzy to flower centers
  • Draw stems and leaves for your flowers with Emerald Big & Glitzy
  • Add some dots of any color on the background
This is a great project for kids of any age. See how creative you can be with design and color.

Glitter on!
Sparkle

Crafting is In!

Last week, a consumer craft show was held in Orlando. Many of the craft manufacturers were there with booths open to the public. They sold product and they did free Make it Take its in their booths. Michaels Stores also had a big booth and invited show attendees to make some great projects. Here is a fun project that ran for two days, using.....don't be surprised...glitter glue!


Over 200 of these frames were made in two days. People lined up at the table to get a turn to sit down and craft. Some participants were on vacation and skipped tourist spots to attend. They actually spent 2 days of their vacation at the CHA Consumer Show!


The crowd was a mix of local people, tourists, and people who came specifically to see the show. People came from Indiana, Michigan, New York, New Jersey and even as far away as England and The Netherlands.

Even though her shirt says she didn't do it, she did! The project was to decorate a frame using bright, colorful buttons from Blumenthal Lansing and Big & Glitzy Glitter Glue from Sulyn.

Everyone seemed to love the projects and left smiling. They loved the abundance of buttons in piles on the tables, picking through them and seeing all the beautiful colors. And of course, who does not love decorating with Big & Glitzy Glitter Glue?

This is a great project idea for a group of adults or children. It would be a fun activity for a birthday party, a family reunion, Vacation Bible School, Cub Scouts, you name it. I will bet that you have a group or two who would love doing this as much as all of these people in Orlando did!

Glitter on!
Sparkle

Related Posts with Thumbnails